There are two options when creating Programmed Requests
- Individual
- CSV (Multiple PR with different scope, priority etc)
Individual Programmed Requests.
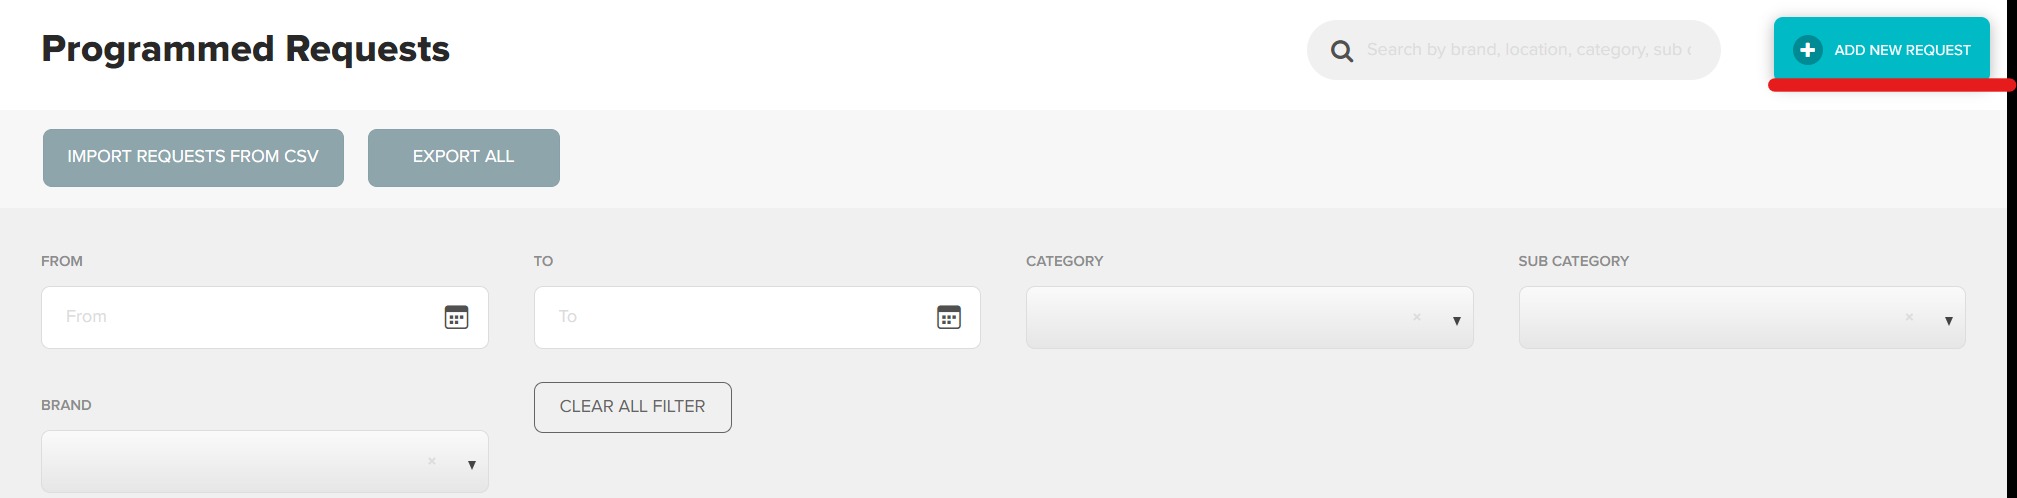
Click the Add New Request button on the main programmed request page.
Set Generation Date / Frequency.
Using the date picker, select the date you would like this requests to first generate. Now select the frequency you would like this to recur.

Enter the General Details.
This information will populate the Programmed Request on generation. Be sure to be as detailed as possible.

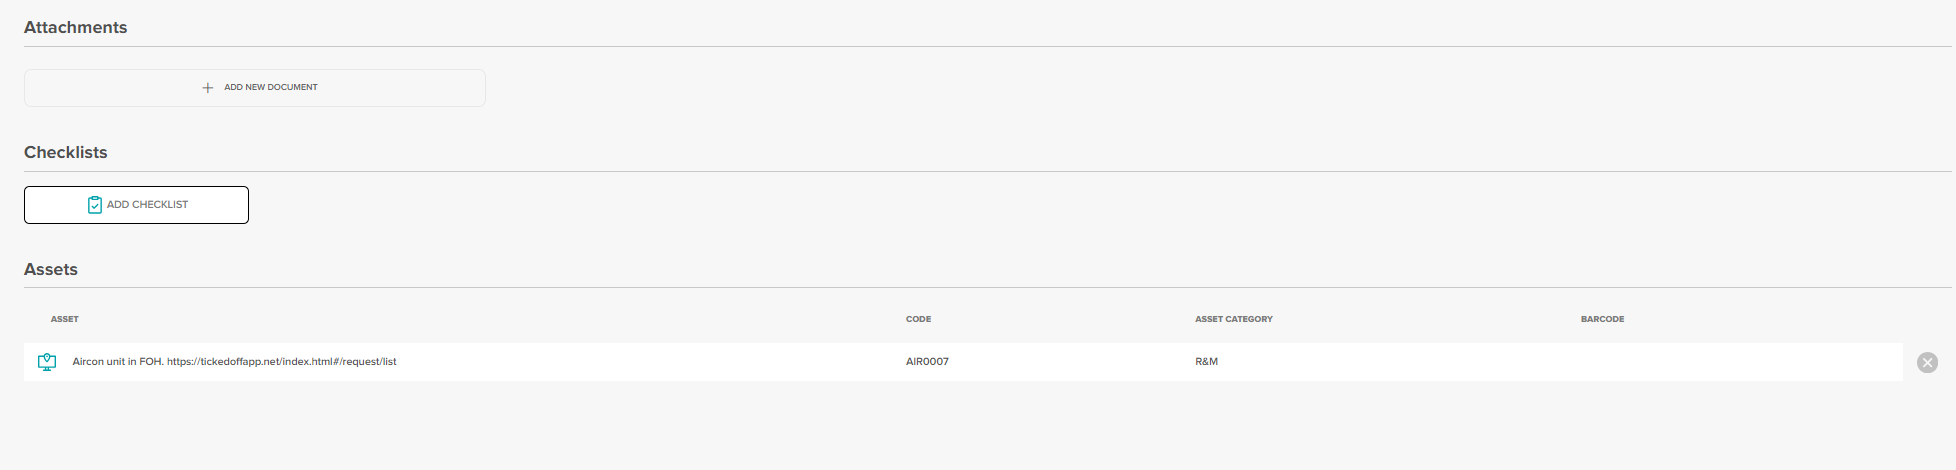
Add Supporting Items.
These could include:
- Documents / Photos
- Checklists
- Assets
Assign Supplier.
If the supplier is known, select by using the dropdown at the bottom of the page. Some things to remember here:
- Clicking auto nominate will nominate this request to the supplier on generation.
- Adding a cost will prefill the items in the PR raised.
- Cost due date will generate a reminder email 2 weeks before it is due.

Requests with no supplier assigned will generate in the pending status. These will need to be manually nominated each time.
CSV Upload .
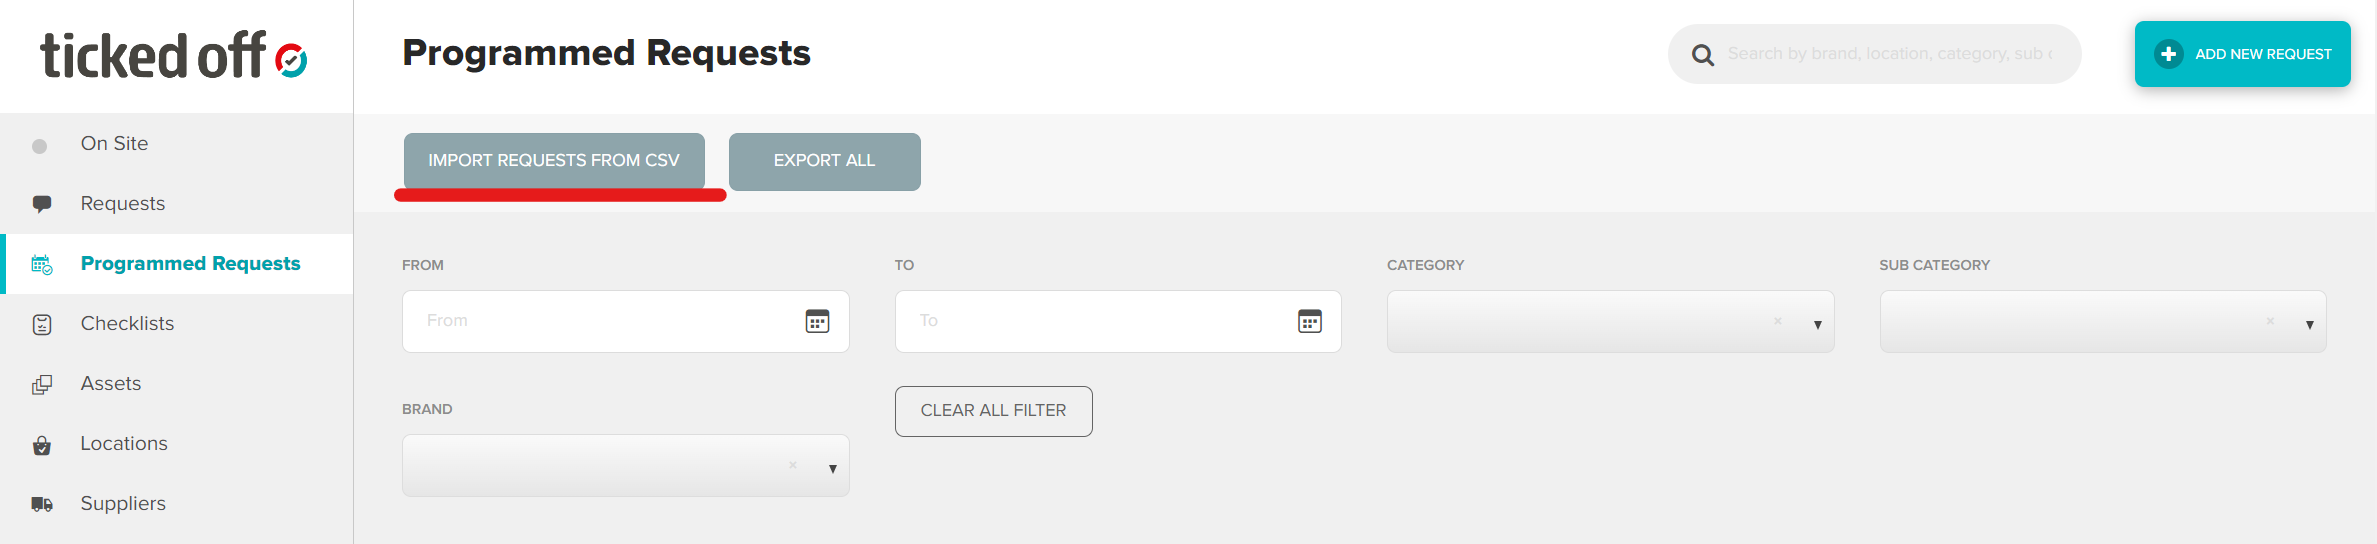
From the main programmed requests page, click on Import Requests from CSV.
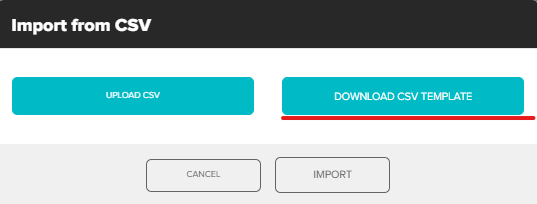
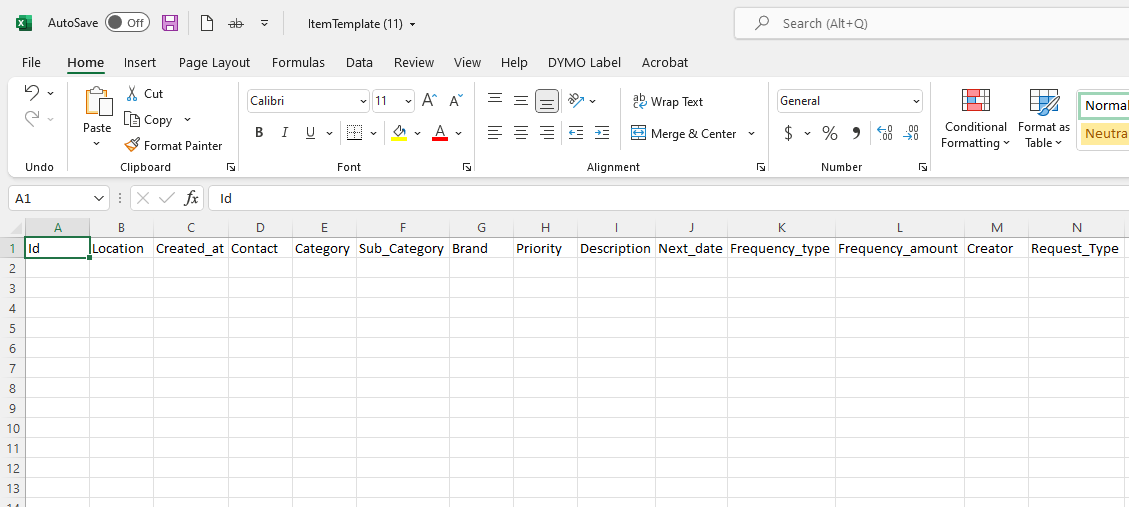
Click Download CSV template. Template will download to your device
Fill in CSV for all sites, leaving the ID column blank.
Save to computer.
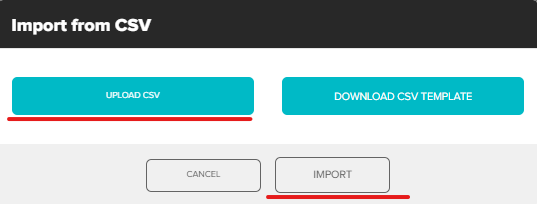
Back in the platform click Upload CSV, select the CSV just created and click Import.
If the CSV is missing any information you will receive an error message listing the line / error.
If it is correct, you will see a success message, and the requests will now be viewable in the scheduled requests tab.
Was this article helpful?
That’s Great!
Thank you for your feedback
Sorry! We couldn't be helpful
Thank you for your feedback
Feedback sent
We appreciate your effort and will try to fix the article